One of the most fun uses of AutoCAD is to create floorplans. Floorplans are at the core of construction blueprints. Some plans contain modifications to existing buildings, while others may lay out the design of something completely new.
In this tutorial, the floorplan for a very simple home will be drawn. This exercise is great for those just starting to use AutoCAD, and shows off the power of its simplest tools.
-
- Start by opening the standard drawing template created on this page.
- Once in the drawing view, our first command will be a rectangle. Commands are quicker ways to choose a tool simply by typing a letter or short code. Without clicking anywhere, simply type “rec” and press enter. The rectangle tool is now open in its default manner and waiting for input.
- First, the rectangle needs an origin. Type “0” to choose the x coordinate of the origin, followed by a comma to move on to the y coordinate, which will also be “0”.
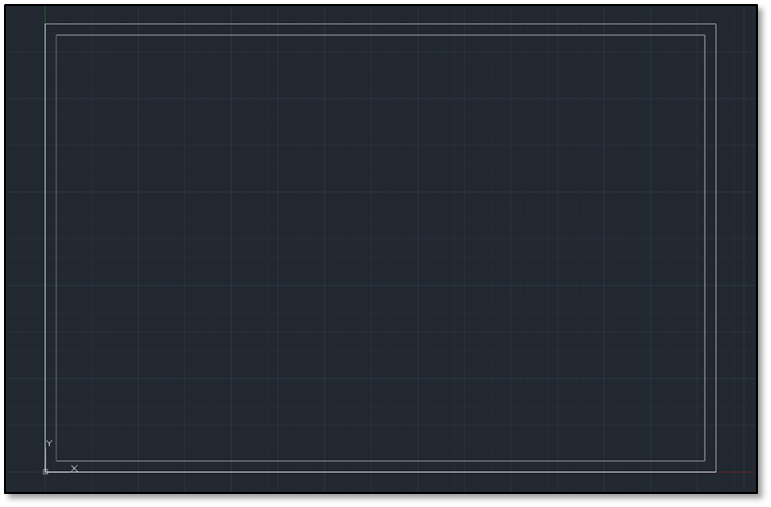
- Now to choose a second point. The home will be 30 feet long by 20 feet wide. Since we have engineering chosen for units, we may type a number followed by inch (“) or foot (‘) directly into the coordinates. Do so now by typing “30’,20’”. We now have the outside wall of the house.
- Next, we need the inside wall. Since the house will have 6-inch-thick exterior walls, the easiest way to place this second rectangle is the offset tool. Open it by typing “off” and pressing enter.
- First, you are asked to choose the offset distance. Input “6””.
- The tool will now ask you to select what to offset. Click on the outside wall and move your cursor inside of the rectangle. A preview of the offset will be present. Click to place it and press enter to exit the command.
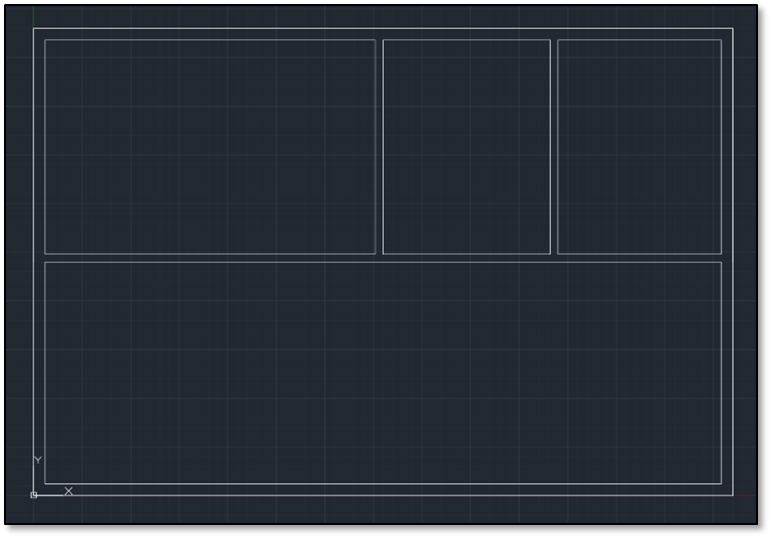
The house can now be divided into rooms. Begin doing so by drawing more rectangles as rooms.
- Use dimensions to make the three rectangles shown: one 15’x10’ and two 7½’x10’. Since these are interior walls, they will only have a width of 4”.
- Open the offset tool again and type “4”” for the distance. Select each rectangle and click its inside to place the walls. This will produce some overlap between the interior and exterior walls, as well as 8” thick walls between rooms.
- To remove excess lines, use the trim tool. Type “tr” and press enter to open the tool. Then press enter a second time to signify all lines may be trimmed by all others.
- Zoom in on unwanted lines and click on them to delete. Now that these are removed, some gaps may be present.
- Press enter again to exit the trim tool. Click on any lines with gaps and click again on their vertex to move it. Close any gaps so the walls are continuous as shown below.
We now have a clean layout, but it’s missing labels. Luckily, writing text in AutoCAD is also straightforward.
Type “mtext” to open the multi-line text tool. This tool is similar to a text box in Microsoft Office.
- Choose the corners of the box as the corners of the room. Label the top left room first.
- Once the box is created you will have a few options. First, type in your text. This will be the kitchen.
- Once text it added, select it and change its height to 1’ in the top left of the annotate ribbon. The default is 0.2”. If the text appears huge, ignore it as it will become the correct size once the text editor is closed.
- Lastly, click the justification button and change it to Middle Center MC. This will place the label in the exact center of the room.
- Close the text editor by clicking the ribbon button, then repeat steps 1-5 to label the bathroom and the porch.
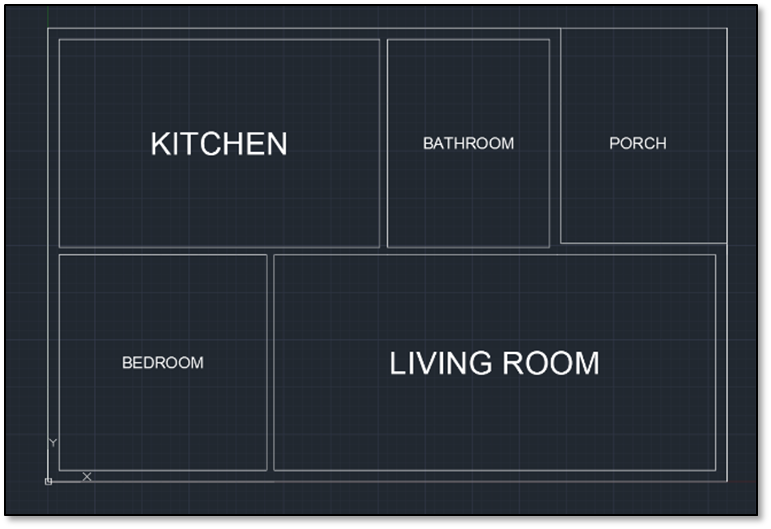
Now we have the beginnings of a floorplan! Continue on your own using the tools discussed and you may make any number of layouts and combinations. With just these few commands, almost an entire large project may be planned. Below is my final plan for the little house. Rectangles and trimming could also be used to make space for doors or to add details like furniture and appliances.